Create an Azure user with minimal permissions for the dynamic attributes connector
This task discusses how to set up a service account with minimum permissions to send dynamic attributes to Security Cloud Control. For a list of these attributes, see Azure connector—About user permissions and imported data.
Before you begin
You must already have a Microsoft Azure account. To set one up, see this page on the Azure documentation site.
Procedure
Step 1 | Log in to the Azure Portal as the owner of the subscription. |
Step 2 | Click Azure Active Directory. |
Step 3 | Find the instance of Azure Active Directory for the application you want to set up. |
Step 4 | Click . |
Step 5 | In the Name field, enter a name to identify this application. |
Step 6 | Enter other information on this page as required by your organization. |
Step 7 | Click Register. |
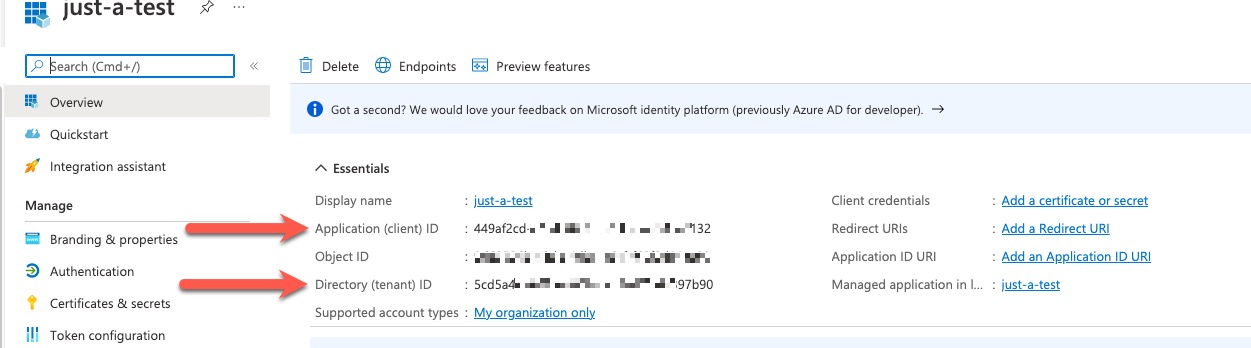
Step 8 | On the next page, write down or copy the Client ID (also referred to as application ID) and the tenant ID (also referred to as the directory ID). A sample follows.
|
Step 9 | Next to Client Credentials, click Add a certificate or secret. |
Step 10 | Click New Client Secret. |
Step 11 | Enter the requested information and click Add. |
Step 12 | Copy the value of the Value field to the clipboard. This value, and not the Secret ID, is the client secret.
|
Step 13 | Go back to the main Azure Portal page and click Subscriptions. |
Step 14 | Click the name of your subscription. |
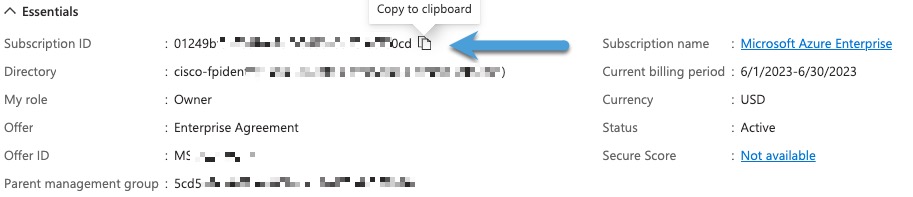
Step 15 | Copy the subscription ID to the clipboard.
|
Step 16 | Click Access Control (IAM). |
Step 17 | Click . |
Step 18 | Click Reader and click Next. |
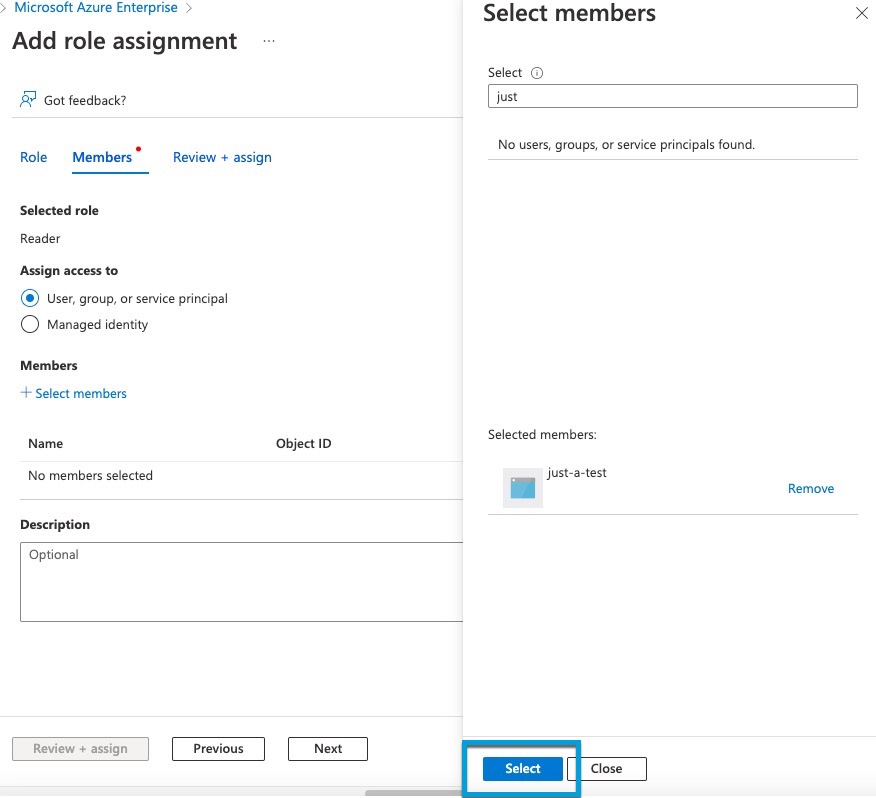
Step 19 | Click Select Members. |
Step 20 | On the right side of the page, click the name of the app you registered and click Select.
|
Step 21 | Click Review + Assign and follow the prompts to complete the action. |